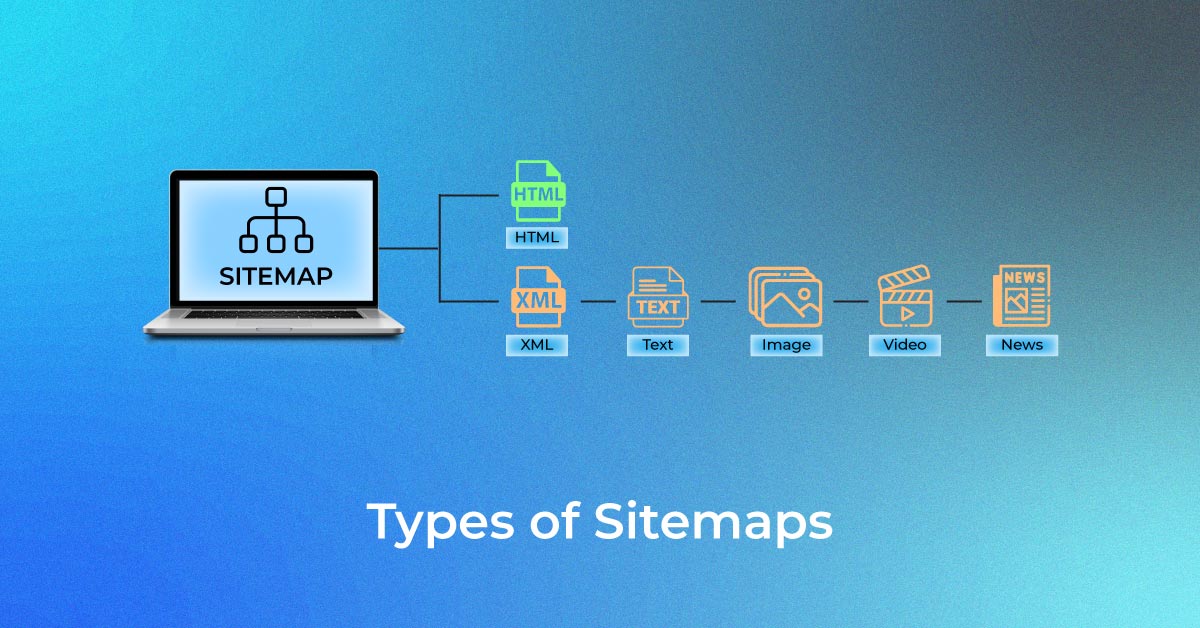
We all know what sitemap is and why having one is essential. If you are new to this topic, you can have a quick read about, “What Is Sitemap In SEO? ” and “Types of Sitemaps”.
Every SEO professional must be aware of the significance of a website’s sitemap.
What does an XML sitemap look like? Here’s an example below:
<?xml version=”1.0″ encoding=”UTF-8″?>
<urlset xmlns=”http://www.sitemaps.org/schemas/sitemap/0.9″>
<url>
<loc>http://www.example.com/foo.html</loc>
<lastmod>2018-06-04</lastmod>
</url>
</urlset>
To create a sitemap, you’ll need to take a following steps:
#Follow the below procedure to enable XML sitemap feature with WordPress using Yoast SEO Plugin:
1. Log In
Log in to your WordPress website and you will see the dashboard in front of you.
2. Click On SEO
You will SEO tab on the left-hand side menu below Settings.
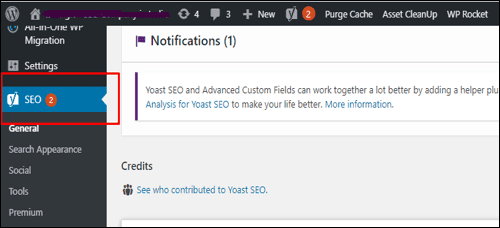
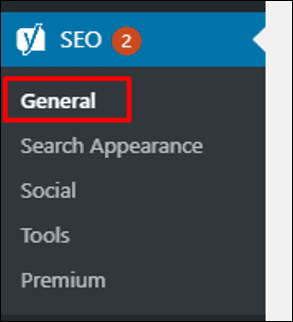
3. Click on General
Click on SEO menu option. You further see options as “General.”
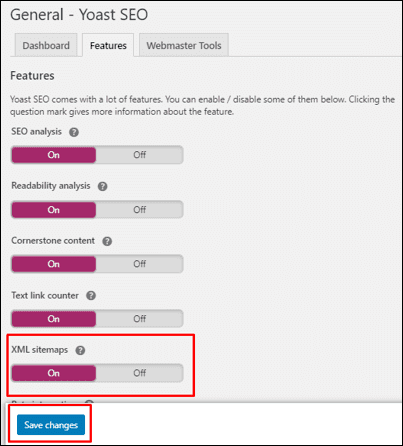
4. Click on the feature tab and turn on the XML sitemap. This enables the sitemap, which is generated by Yoast. Then click on the save changes.
5. Your website will now use the Yoast plugin to create a sitemap. To see this sitemap, click on “See the XML Sitemap.”
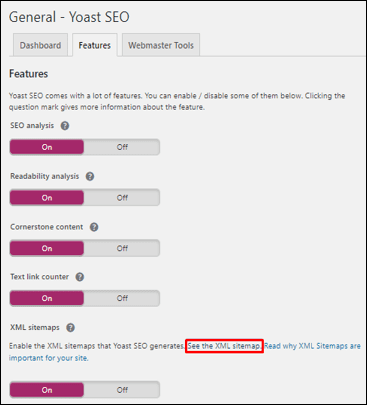
This is how you will be able to see sitemap in a new tab:
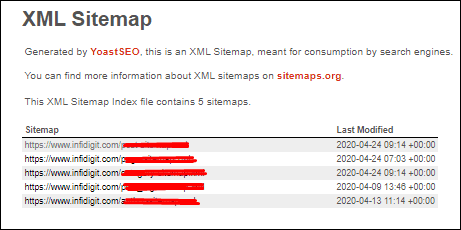
Did you know Screaming Frog Can Create XML Sitemap?
Well, that’s just one of many things that Screaming Frog can do besides finding broken links, audit redirects, Crawl JS, technical audits, and more.
Screaming Frog is an industry-leading SEO Tool used to crawl a website that is compatible with Windows, Mac, and even Ubuntu.
Creating a sitemap using Screaming Frog is easy. Before we proceed, there are two things that we need to know:
- Free version of Screaming Frog crawls only 500 pages and provides fewer features
- Paid version enables you to access all the features and functions.
Now, let’s create a sitemap using Screaming Frog
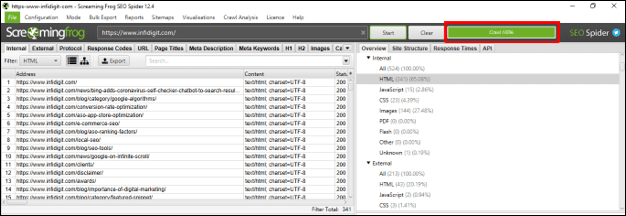
1. Open Screaming Frog
2. Go to Mode in the main menu and select Spider.

3. Add your website and click Start

4. When you see 100%, this means your site has been crawled completely.
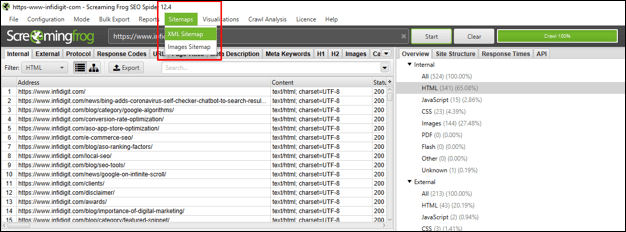
5. Click on sitemap under the main menu, then click on XML sitemap.
6. Check a few boxes that you might feel are important. A pop-up will appear to ask if you wish to.
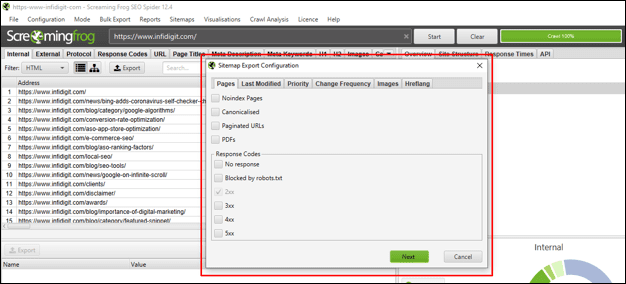
Let us see what each of these boxes stand for
The pop-up box has six menus. Under every menu, there are few checkboxes. Let us understand the meaning of these checkboxes.
Under Pages these are the following check options:
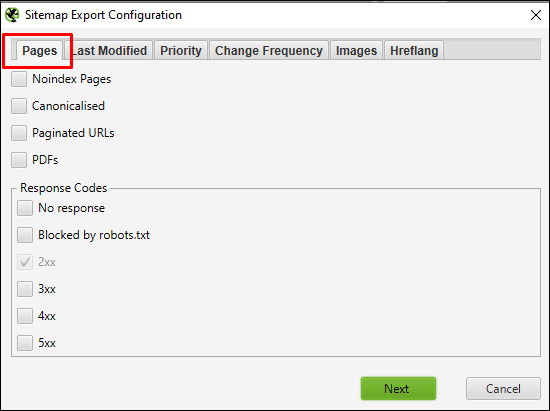
Defining each term:
-
Noindex Pages
A noindex tag in the header of a page means search engine bot would not crawl or index them. SEO experts recommend not to check this box. Reason being, sitemap includes a list of URL’s that google bots can crawl.
-
Canonicalized
Imagine multiple URLs pointing at one page through canonical. For example, https://www.myntra.com/shoe, https://www.myntra.com/shoes, https://www.myntra.com/shoeforall, https://www.myntra.com/shoesforall are all canonical to https://www.myntra.com/shoes. Since all the priority has already been given to /shoes page via canonicalization, we recommend not to include its other variations in the XML sitemap.
-
Paginated URLs
As per the best practices, paginated pages are always canonicalized to the main page. Including paginated pages in XML sitemap could be of no help.
-
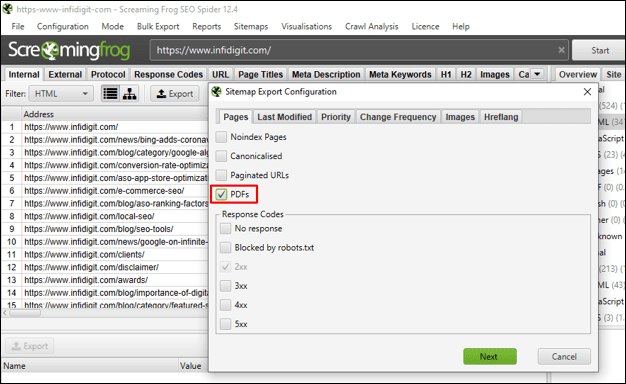
PDF
PDF and the link within them, are crawlable. It is recommended to have this box ticked.
-
Response Code
200 OK or 2xx response code is automatically chosen.
Image Tab or Image Menu
Under the image tab, select:
(a) Include images
(b) Include only relevant images with up-to 10 in-links
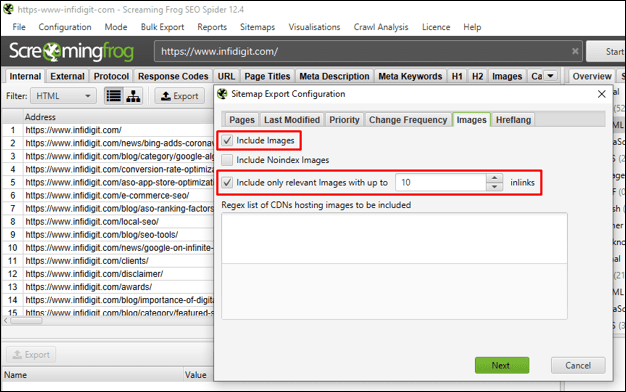
Once finished, click on “Next”.
Save your sitemap. You will need to upload it to your website from that location.
Done! We have successfully created an XML sitemap using Screaming Frog. Follow the above steps carefully while creating a sitemap using the screaming frog.
Now, since we have understood how to create a sitemap using the Screaming Frog, let’s see how to upload a sitemap.
Submitting a sitemap to Google
- Rename sitemap. Suppose, your sitemap includes all fashion product. Then you can rename it in this format sitemap_products.xml. If you never had a sitemap before you can rename the file to sitemap.xml
- Upload the sitemap to the root folder of your website
- Access the sitemap once you upload it to your root folder at https://www.fashion.com/sitemap_products.xml or https://www.fashion.com/sitemap.xml
- Rename sitemap with the products or category that it includes because naming schemes are very crucial for a sitemap. As for example, for “boys’ products,” the sitemap could be renamed as sitemap_boys.xml and so on.
- Go to Search Console -> Sitemaps -> paste your sitemap location -> Submit
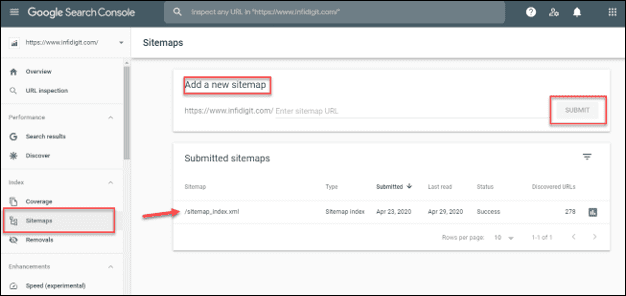
Congratulations, you have successfully uploaded your sitemap.
With these steps/methods, you can create a sitemap for any website. Be it an eCommerce website, blog, or any other. However, there are a few things that one needs to consider while creating a sitemap.
Do not include:
(a) Duplicate, Canonicalized, or Paginated pages.
(b) Pages with Redirections (3xx), Client Error (4xx) or Server Error (5xx) pages
(c) URL’s with parameters (mostly created by filters or facets
(d) Pages that are blocked by robots.txt or with noindex
Fixing common website errors that affect your sitemap
Several factors can affect the health of your website. You can detect these by availing SEO services, which highlight all the common errors that can be resolved to strengthen your sitemap. These errors can be detected by regularly and meticulously looking into your website architecture, or by availing SEO audit services, which can help you find out all the issues with your sitemap. Here are the two of the most common website errors and how they can be fixed:
1) Low-Quality Pages on a Sitemap
A low-quality page on a sitemap can be anything from an unoptimized page to a page with poor content. To eradicate low-quality pages from a sitemap, there are two approaches you can take:
- Enhance the content or optimize the page. Add keywords to the page’s content, including the meta tags, to enhance the SEO activity of the page. Moreover, carry out processes like image optimization to ensure that the page takes less time to load and is healthy enough for search engines to detect.
- Remove these pages from the sitemap and get them properly audited to ascertain whether their assets are recoverable or not. If the contents of the page are recoverable, then you can put some time and effort into enhancing those pages and then add them back into the sitemap once you’re confident that these pages aren’t low-quality anymore.
- You can even optimize these pages with the help of a competent SEO services provider, who can improve the health of your Web page. This is done by resolving broken internal links, organically adding keywords into the content of the Web pages, and many other SEO activities.
2) Pages erroneously excluded from the sitemap
A page can be excluded from the sitemap by mistake. But it can be added to the sitemap conveniently by providing it with proper indexing and adding it to your website architecture. Usually, pages excluded from a sitemap are not healthy or SEO-friendly, which is also a sign for you to optimize them in the areas they might be lagging in. While acquainting yourself with how to create a sitemap, whether XML or some other format, make sure that you also understand how to effectively add Web pages to an already created sitemap so that you don’t have to worry about this mistake.
It is essential to have XML sitemaps since it helps to achieve faster indexing from Google. Although having an XML sitemap will not accelerate your business if compared to others, but it is important to keep up in the race. if you are still facing issues in submitting the sitemap, get in touch with an SEO agency or your website developer.
Popular Searches
How useful was this post?
3 / 5. 2







2 thoughts on “Step-by-Step Guide to Create a Sitemap and Submit It to Google”
“Dude, your stuff is the bomb! Blog saved my business.”
Thanks. Read our latest posts for more updates.